Sharing #Ontariosnowtrails with the World—10 Tips for Creating the Best GoPro Videos this Season
By Jeff McGirr
Jeff McGirr is a powersports & marine enthusiast who loves sharing Northern Ontario experiences with you through his articles and videos.
January 18, 2016
Back in 2007 when I first started the Lucrestyle Productions Youtube Channel I had no idea that 7 years later I would have over 300 video memories of my adventures. In fact back in 2007 I started filming with a small 1080p pocket camera and clunky analog security camera that required 12 AA batteries and several feet of cable just to capture point of view footage. A few short years later the GoPro entered the market and made the task of recording high quality video in the outdoors much easier! In fact these little high quality devices are so handy even professional motorsports media firms like SuperTraxx Media use them to capture the fun!
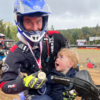
Each year as I ride the backcountry and trails of Ontario I see more and more riders pass by with cameras fastened to their helmets—I can tell they're recording their adventure by the little blinking red light. But more often than not, riders return home, scan over the footage and then download it to their computer's hard drive to be forgotten forever. So without further ado here’s 10 tips to help share your ride footage!
#10 - Read the Manual
Become familiar with your camera gear and how it operates, nothing is more frustrating than messing with mounts and settings trail side at -20. While you’re in the truck heading north or sitting on the couch waiting for winter to come calibrate your camera gear settings and mounting locations – this will make it easier and more efficient when you’re out in the elements. Take this time to make sure the angle you position the camera at will reflect the shot you want. Sit on your snowmobile and pretend to ride, you will be surprised how your head slightly drops angled down, position the camera accordingly.
#9 - Practice Makes Perfect
Find a simple video editing software, I personally use Cyberlink Powder Director however there are many software packages that are simple to use. Prior to the season, practice stitching together a few clips and produce a short movie. You will now be ready when the snow flies to get your latest adventure live just after it happens
#8 - Tunes!
Consider adding a little music to your video to add to the atmosphere and drama of the adventure. Do not paste the music over the sled sounds and voices so they are inaudible, just add a track or two to compliment the beauty sound of your snowmobile!
#7 - Don't Be Shy
Log onto YouTube and create an account and channel for yourself. Upload a background and fill in the "about your channel" descriptions. Start inviting fellow snowmobilers and family members to subscribe to your channel to help spread the word!
#6 - Dress For Success
Wear bright colours and deck your sled out with hot a design, this will make you and your sled stick out amongst the tree’s and snow dust making your video’s look visually stunning! Red’s, Oranges, Yellow, Green and Blue all stick out against the White background.
#5 - Would You Watch This?
Think about composition when you film. Although just setting to record and riding is easy and will capture that un expected event, it's a lot easier to edit and produce a short video with small 30-90 second clips. Yes, that’s right, I said 30 to 90 seconds… No one will sit and watch 1.5hrs of trail riding footage, heck you won’t even sit and watch it. Think about what you want to see in the shot—the snow, trails, tree’s and riders. And think about what you don't need to see—your snotty face looking into the lens and ummm...well that unexpected pee break.
#4 - Get Creative
The best angles and shots use the most unique mounting locations. Don’t be afraid to try out your other mounts such as the suction cup and stick it to your sled. Mounting to locations like the side of the helmet and the GoPro chest mount give great riding perspectives. Take a few shots of the tree’s, scenery, rivers, lakes, lodge or cottage to add to the overall appeal and atmosphere. If you’re going to mount your camera somewhere risky like on your ski or running board consider adding a small tether, this will insure it does not get lost. The best videos have a mix of camera angles and perspectives.
#3 – Share Your Footage
If each riding friend has a camera at the end of the day sit down and download each other’s footage. This makes it really easy to capture multiple angles and perspectives adding to the quality and intensity of your production.
#2 – Edit and Publish That Video NOW!
Don’t wait six month to share your footage online with the world. Get it up and public within a few days to share your epic ride while other snowmobilers are thinking about snowmobiling. This will also entice others who may not be into the sport to rent a sled or give Snowmobiling a try with a friend! Post it on Youtube, Facebook & Twitter and use the tag #OntarioSnowTrails
#1 - Look Alive
Last but not least, the most important GoPro tip in the list comes from the wilderness itself. GoPro uses the tagline “Be a Hero” this applies to the camera and its capabilities. Just because that red light is blinking and everyone is recording does not mean you should do something you are not comfortable with. Use your head, ride smart and live to publish what you’ve shot!
See you on the Trails!
Showing 'Edited Body' is no longer supported.
About Jeff McGirr
Jeff McGirr is a powersports & marine enthusiast who loves sharing Northern Ontario experiences with you through his articles and videos.