By James Smedley
James Smedley is a photographer and writer with over 400 articles and 1,000 images in U.S. and Canadian books, magazines and newspapers.
April 12, 2023
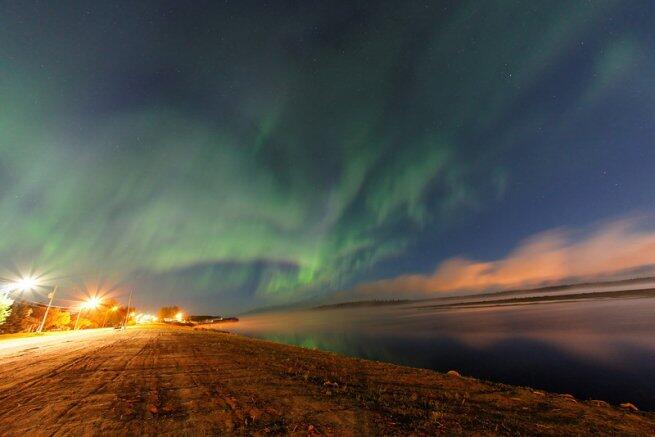
Stepping out under a clear night sky alive with the northern lights is not easily forgotten. Shimmering bands of green, white, and pinkish red dancing in the Northeastern Ontario sky is a rare and unpredictable occurrence. Those who have tried to photograph the phenomena know that it’s not simply a matter of pulling out the point-and-shoot and firing off a few snapshots.
The northern lights, or aurora borealis, are a magical natural phenomenon. Light reflecting off the polar ice caps was the explanation I grew up with but I’ve also heard them explained as electrically charged particles from the sun colliding with oxygen and nitrogen gas particles to produce photons of coloured light. Whatever the cause, capturing this natural light show is possible if we follow a few simple steps:
Go North by Night
The farther north we go, the greater the chance of seeing the aurora borealis. An area with little or no light pollution is best, like the frozen surface of a remote Northeastern Ontario lake. Northern lights can appear at anytime of the year, but fall and early winter are peak times.
Use a Tripod
Photographing in low light requires a very slow shutter speed and any movement of the camera translates into blur. Keeping our camera completely still on a tripod means we can get sharp images of subjects in darkness.
Use Manual Mode
Taking control of our camera’s settings is key to getting great results. Let in the maximum amount of light by using the widest aperture setting our camera is capable of.
Night photography calls for long exposures. Try a shutter speed of five seconds. If the image is too dark we can increase the shutter speed to 10, 15 or even 30 seconds, until we get the results we are after.
Clear nights are key. With the right conditions, anywhere from Sudbury to Timmins, and all points between and beyond, hold the potential for spectacular displays of dancing light. Keep an eye on the BIG Northeastern Ontario sky for your chance to capture the northern lights.
Click on above links for the related articles series on Increasing your Odds to view the Northern Lights.
Showing 'Edited Body' is no longer supported.
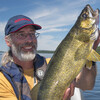
About James Smedley
Professional photographer and writer James Smedley’s contributions—more than 400 pieces and close to 1,000 images—to U.S. and Canadian books, magazines, and newspapers have earned him over 40 national and international awards. In addition to teaching photography workshops, James is the travel editor at Ontario OUT of DOORS magazine. James has fly-fished for brook trout and arctic grayling in far northern rivers and continues to cast for trout, bass, and steelhead near his home in the northern Ontario town of Wawa where he lives with his wife Francine and daughters Islay and Lillian.